
Household cleaning routines often involve an array of commercial products, but one of the most effective solutions sits right in your pantry. White vinegar combined with water creates a powerful, natural cleaning agent that tackles dirt, grime, and bacteria on various floor types. This method has gained significant traction among homeowners seeking eco-friendly alternatives to chemical-laden cleaners. The simplicity of this two-ingredient solution makes floor maintenance accessible, affordable, and safe for families with children and pets. Understanding how to properly use vinegar for floor cleaning ensures optimal results while protecting your flooring investment.
Why choose vinegar for cleaning your floors ?
Natural disinfecting properties
Vinegar contains acetic acid, typically at a concentration of 5%, which gives it remarkable cleaning capabilities. This natural acid breaks down dirt, dissolves mineral deposits, and eliminates odor-causing bacteria without leaving harmful chemical residues. Unlike synthetic cleaners that may contain volatile organic compounds, vinegar offers a safer alternative for indoor air quality. The antibacterial properties make it particularly effective against common household germs, providing a cleaner environment for your family.
Cost-effectiveness and accessibility
Compared to specialized floor cleaning products, vinegar represents a fraction of the cost. A single gallon of white vinegar can produce numerous batches of cleaning solution, making it an economical choice for regular maintenance. The widespread availability of vinegar in grocery stores means you never need to make special trips to purchase cleaning supplies. This accessibility makes it an ideal solution for budget-conscious households.
Environmental benefits
Choosing vinegar over commercial cleaners reduces your household’s environmental footprint. The biodegradable nature of vinegar means it doesn’t contribute to water pollution or harm aquatic ecosystems. By eliminating plastic bottles from multiple cleaning products, you also reduce plastic waste. The minimal processing required to produce vinegar results in a lower carbon footprint compared to synthetic cleaning agents.
Understanding the practical application of this knowledge requires knowing exactly how to prepare the cleaning solution.
Preparing a homemade vinegar cleaner
Essential ingredients and proportions
The standard formula calls for ½ cup of white vinegar mixed with one gallon of hot water. This ratio provides sufficient cleaning power without leaving excessive acidity on your floors. Hot water enhances the cleaning effectiveness by helping to dissolve dirt and grime more efficiently. For smaller cleaning tasks, you can proportionally reduce the amounts while maintaining the same ratio.
| Floor Area | White Vinegar | Hot Water |
|---|---|---|
| Small room (100-200 sq ft) | 2 tablespoons | 1 quart |
| Medium room (200-400 sq ft) | ¼ cup | ½ gallon |
| Large area (400+ sq ft) | ½ cup | 1 gallon |
Optional enhancements
While vinegar and water work effectively alone, you can customize your cleaning solution with natural additions. Citrus peels infused in vinegar for several days create a pleasant scent and add extra grease-cutting power, particularly useful for kitchen floors. A few drops of essential oils like lavender or tea tree can mask vinegar’s sharp odor while adding additional antibacterial properties. These enhancements make the cleaning experience more enjoyable without compromising the natural integrity of the solution.
Storage and shelf life
Mixed vinegar cleaning solution maintains its effectiveness for several weeks when stored properly. Keep the mixture in a sealed container away from direct sunlight to preserve its cleaning properties. Glass or plastic spray bottles work well for convenient application. Label your containers clearly to avoid confusion with other household solutions. The indefinite shelf life of unmixed vinegar means you can always prepare fresh batches as needed.
With your cleaning solution prepared, you’re ready to tackle the actual cleaning process.
Steps to clean your floors with vinegar and water
Pre-cleaning preparation
Before applying your vinegar solution, remove loose debris by sweeping or vacuuming thoroughly. This prevents dirt from turning into muddy streaks when wet. Move furniture and obstacles to access all floor areas. Check for any spills or sticky spots that might require pre-treatment. This preparation ensures the vinegar solution works on actual grime rather than just pushing dirt around.
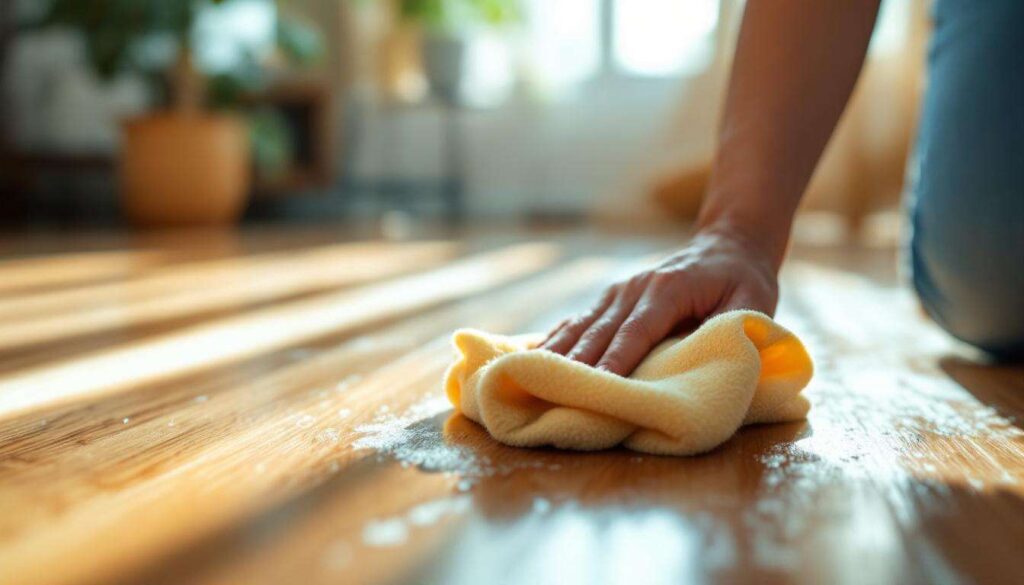
Application technique
Dip your mop into the vinegar solution and wring it thoroughly until it’s only slightly damp. Excess moisture can damage certain floor types and leave streaks. Work in sections, moving systematically across the room to ensure complete coverage. Use overlapping strokes in a figure-eight pattern for optimal cleaning efficiency. For stubborn spots, allow the solution to sit for a minute before scrubbing gently.
Drying and finishing
After mopping, allow floors to air dry completely, which typically takes 10-15 minutes depending on ventilation. Open windows or use fans to accelerate drying time and dissipate the vinegar smell. The odor disappears quickly as the solution dries, leaving no lingering scent. For high-traffic areas, consider a second pass with a clean, damp mop using plain water to remove any residual vinegar.
While vinegar works wonders on many surfaces, certain floor types require different approaches.
Surfaces to avoid with vinegar
Natural stone flooring
Marble, granite, limestone, and travertine floors should never be cleaned with vinegar. The acidic nature of vinegar etches and dulls the polished surface of these stones, causing permanent damage. Even diluted vinegar can compromise the sealant protecting these expensive materials. For natural stone, use pH-neutral cleaners specifically formulated for these surfaces.
Waxed or unfinished wood
Wooden floors without protective sealant or those with wax finishes require special care. Vinegar can strip away wax coatings and penetrate unfinished wood, causing discoloration and swelling. These floor types need oil-based or specially formulated wood cleaners. If you’re uncertain about your floor’s finish, test in an inconspicuous area or consult your flooring manufacturer.
Certain tile grouts
While ceramic tiles tolerate vinegar well, some grout types can deteriorate from repeated acid exposure. Unsealed grout is particularly vulnerable to erosion and discoloration. If your grout appears porous or crumbly, avoid vinegar-based cleaners. Consider sealing grout lines before using vinegar solutions to protect these vulnerable areas.
Maximizing the benefits of vinegar cleaning requires following specific best practices.
Tips for effective and safe cleaning
Always conduct spot tests
Before cleaning an entire floor, apply your vinegar solution to a small, hidden area and wait 24 hours. This precaution reveals any adverse reactions without risking visible damage. Check for discoloration, dulling, or texture changes. This simple step prevents costly mistakes, especially with newer or unfamiliar flooring materials.
Proper equipment selection
Microfiber mops work exceptionally well with vinegar solutions because they trap dirt effectively while requiring less moisture. Avoid abrasive scrubbing pads that can scratch floor surfaces. For textured floors, a soft-bristled brush helps reach into grooves without causing damage. Quality equipment enhances cleaning results and protects your flooring investment.
Ventilation considerations
While vinegar is non-toxic, its strong odor can be overwhelming in enclosed spaces. Ensure adequate ventilation by opening windows and doors during cleaning. This practice also speeds drying time and prevents moisture accumulation. Good airflow creates a more pleasant cleaning experience and reduces humidity that could affect certain floor types.
- Never mix vinegar with bleach or hydrogen peroxide, as this creates dangerous fumes
- Store vinegar cleaning solutions away from children and pets
- Rinse mop heads thoroughly after use to prevent vinegar odor buildup
- Replace cleaning solution if it becomes visibly dirty during use
Establishing a consistent cleaning schedule maximizes the effectiveness of this natural method.
Frequency of cleaning floors with vinegar
High-traffic areas
Kitchens, entryways, and hallways benefit from weekly cleaning with vinegar solution due to constant use. These areas accumulate dirt, spills, and bacteria more rapidly than other spaces. Regular maintenance prevents buildup that becomes harder to remove over time. The gentle nature of diluted vinegar allows for frequent use without damaging floors.
Moderate-use spaces
Living rooms, dining areas, and bedrooms typically require cleaning every two weeks. These spaces experience less foot traffic and fewer spills, making less frequent cleaning sufficient. Adjust this schedule based on household size, presence of pets, and individual lifestyle factors. Spot cleaning between regular sessions addresses isolated messes promptly.
Seasonal deep cleaning
Conduct thorough floor cleaning with vinegar solution quarterly for comprehensive maintenance. These deeper sessions involve moving all furniture and addressing neglected corners and edges. Seasonal cleaning provides an opportunity to assess floor condition and address any developing issues. This schedule complements regular maintenance while preventing excessive wear.
| Room Type | Recommended Frequency | Special Considerations |
|---|---|---|
| Kitchen | Weekly | Address spills immediately |
| Bathroom | Weekly | Focus on moisture-prone areas |
| Living areas | Bi-weekly | Increase frequency with pets |
| Bedrooms | Bi-weekly | Vacuum before mopping |
Cleaning floors with vinegar and water represents a practical, economical, and environmentally responsible approach to home maintenance. This simple two-ingredient solution effectively removes dirt and bacteria from most hard flooring surfaces while avoiding the harsh chemicals found in commercial products. The key to success lies in proper dilution, appropriate application techniques, and understanding which surfaces benefit from this method. By conducting spot tests, using correct equipment, and maintaining a regular cleaning schedule, you can keep your floors spotless while protecting both your family’s health and the environment. The versatility and affordability of vinegar make it an indispensable tool in any household cleaning arsenal, proving that effective solutions don’t require complicated formulas or expensive products.